Quick Start
This tutorial will help you get started with GMSSH quickly.
Prerequisites
Before using GMSSH, you only need to prepare the following environment:
1. Basic Requirements
- A Linux server: Whether it's a cloud server, local virtual machine, or Raspberry Pi.
- SSH service enabled: Ensure SSH and SFTP are enabled on the server (default port 22), with a login account available (root or a user with sudo privileges).
2. Compatibility
GMSSH is built on standard protocols with excellent compatibility. Below is the list of officially tested and supported systems:
| OS Family | Compatible Versions |
|---|---|
| Ubuntu | 18.04 / 20.04 / 22.04 / 24.04 and above |
| Debian | 9 / 10 / 11 / 12 and above |
| CentOS / RHEL | 7.x / 8.x / 9.x and Rocky Linux / AlmaLinux |
| Chinese OS | OpenEuler / Deepin / UOS (Linux kernel based) |
| Others | Raspberry Pi (Raspberry Pi OS) / Armbian |
Tip
If your system is not listed above, as long as the kernel version is Linux 3.10+ and meets the above conditions, it should be fully compatible. GMSSH is statically compiled in Go with no system library dependencies.
Quick Connect & Login (Web Edition)
You can manage your servers instantly through the GMSSH cloud edition without installing any software.
Step 1: Access the Platform
Open your browser and visit https://web.gmssh.com/. 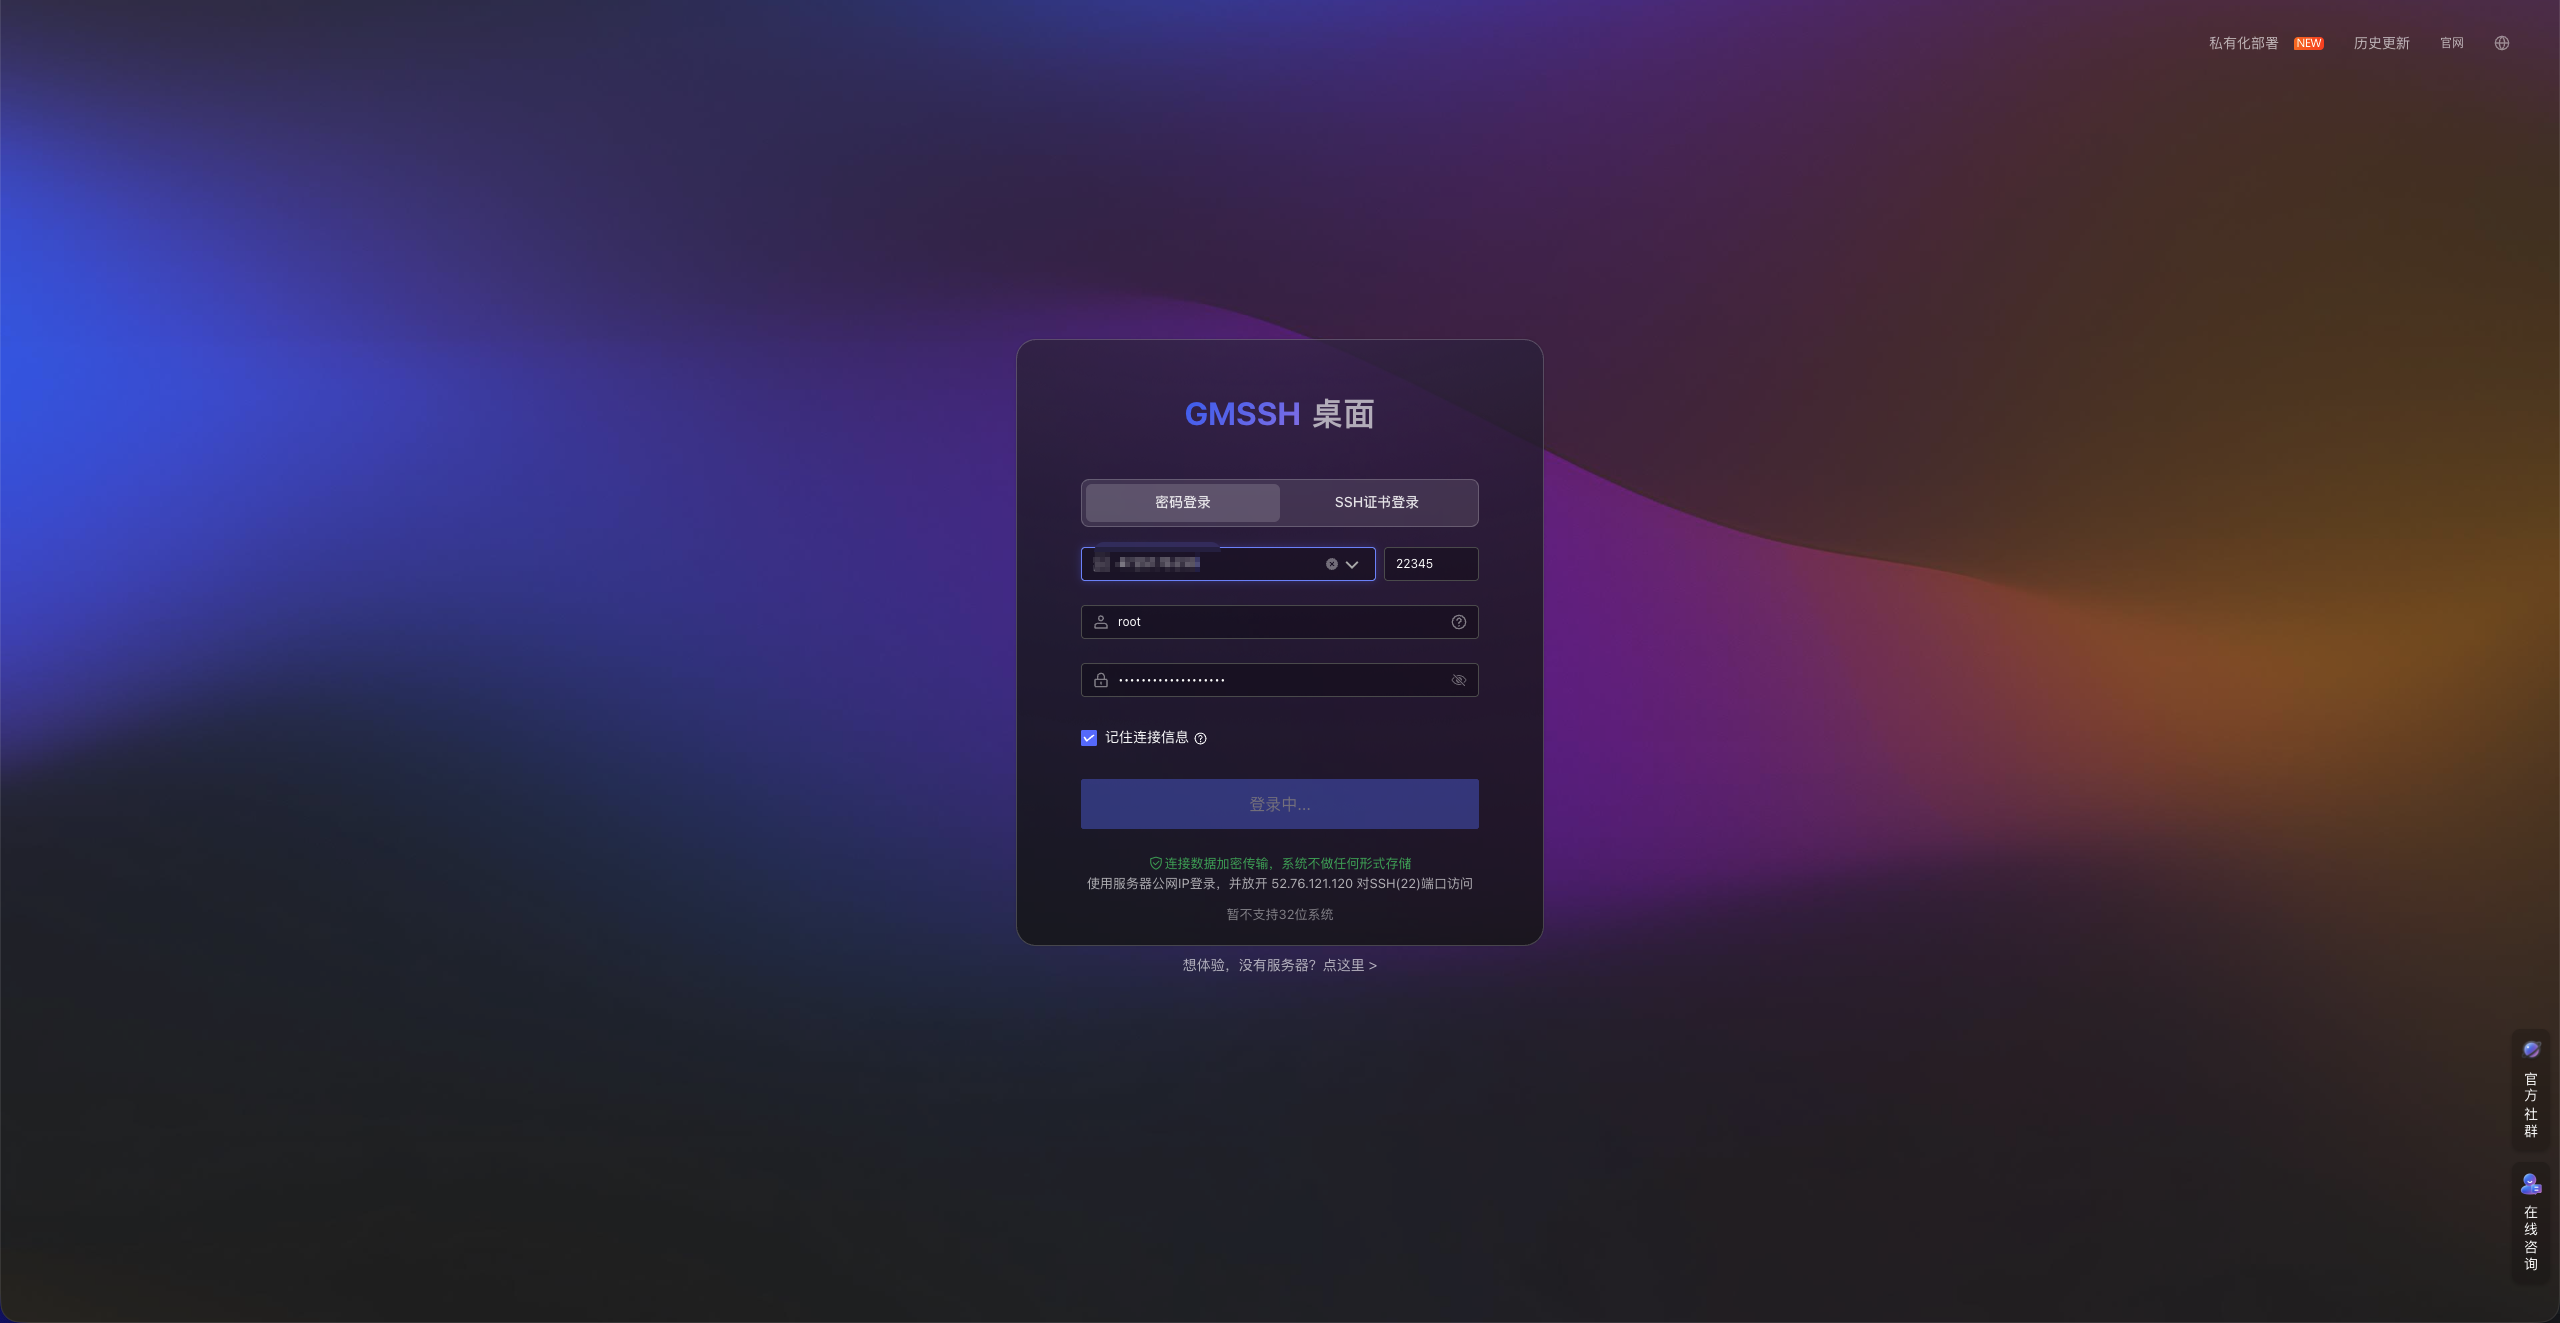
Step 2: Authentication
Choose one of the following login methods based on your server configuration:
- Password Login: Enter the SSH account (e.g.,
root) and the corresponding password. - Private Key Login: Click the certificate option to upload your private key. Currently supported encryption algorithms:
ED25519(recommended)ECDSARSA, etc.
Important Security Note
Allow Access: Since you are using the online edition, make sure your target server's firewall has allowed access from the GMSSH cloud cluster (default SSH port 22).
If you have strict restrictions on public port exposure, we recommend using the GMSSH Self-Hosted Edition or Desktop Client.
Self-Hosted Deployment
Visit GMSSH Self-Hosted Deployment and choose between Docker deployment or Shell script based on your server environment. Either way, you only need to copy and execute a single command, and the system will automatically complete installation and configuration.
Docker Deployment
If you want to run GMSSH on your own server, you can use Docker for rapid deployment.
📋 Requirements
| Item | Minimum | Recommended |
|---|---|---|
| Docker | 17.03+ | 20.10+ |
| CPU | 1 core 2 threads | 2 cores 4 threads+ |
| Memory | 1 GB | 4 GB |
| Disk Space | 4 GB | 10 GB+ |
🌐 Network & Port Configuration
- Network Access: Some AI features and cloud plugins require internet access. In air-gapped environments, some online features will be limited.
- Firewall: The GMSSH container maps to port
8090by default (corresponding to port80inside the container). Ensure this port is allowed through your firewall.
🚀 Deployment Steps
Select the deployment command matching your server's OS and CPU architecture (x86 / ARM), then paste and execute in your terminal: 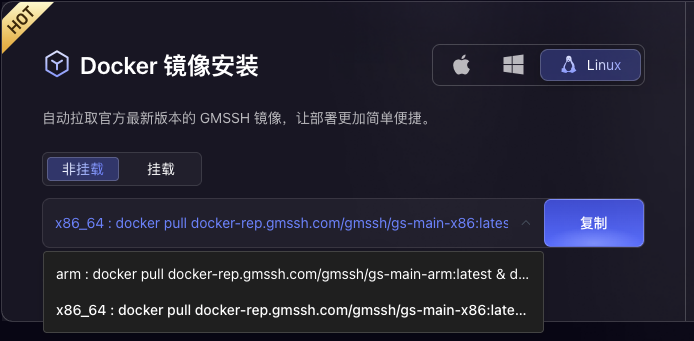
ARM Architecture
docker pull docker-rep.gmssh.com/gmssh/gs-main-arm:latest && \
docker run -d --name gm-service-latest \
  -p 8090:80 \
  --restart always \
  docker-rep.gmssh.com/gmssh/gs-main-arm:latest
x86 Architecture
docker pull docker-rep.gmssh.com/gmssh/gs-main-x86:latest && \
docker run -d --name gm-service-latest \
  -p 8090:80 \
  --restart always \
  docker-rep.gmssh.com/gmssh/gs-main-x86:latest
Verify Deployment
After deployment, open your browser and visit http://<Server-IP>:8090 to access the GMSSH interface.
Native Shell Script Deployment
If you want to run GMSSH directly on the Linux system, or your environment does not support / has not installed Docker, you can use our one-click installation script.
Requirements
| Item | Minimum | Recommended |
|---|---|---|
| Operating System | Linux kernel 3.10+ | Ubuntu 18.04+ / CentOS 7+ |
| Architecture | x86_64 / arm64 | - |
| CPU / Memory | 1 core 2 threads / 1 GB | 2 cores 4 threads / 4 GB |
| Disk Space | 4 GB | 10 GB+ |
Network & Port Configuration
- Network Access: The installation process downloads binaries from the cloud; some AI features and plugins require internet access.
- Port Usage: The shell script uses port 80 by default. Ensure this port is not occupied by Nginx or other services, and is allowed through your firewall.
One-Click Deployment Command
Copy and execute the following command on your server terminal:
curl -fsSL https://gmb-prod-gw.oss-accelerate.aliyuncs.com/up/14/gm/20260304/19442169a81b15117a66yqqt2_sh.file -o gm.sh && \
chmod +x gm.sh && \
sudo ./gm.sh install
Offline Deployment
For intranet or air-gapped servers, GMSSH provides complete offline installation packages. You can download the offline resources for your architecture from the Self-Hosted Deployment page.
Option 1: Docker Image Offline Installation
This option is for systems with Docker already installed.
Import Image: Upload the downloaded
.tarimage to your server and execute:# Replace with your actual file name docker load -i gm_img.0.0.5.tarStart Container:
docker run -d --name gm-service -p 8090:80 --restart always gs-main:latestCheck Status:
- Run
docker ps -ato check the container status. - If the container is stopped, run
docker start gm-serviceto start it manually.
- Run
Access Service: Ensure your security group allows TCP 8090, then visit:
http://<Server-IP>:8090/newweb/#/. Note: Port 8090 can be customized.
Option 2: Native Shell Offline Installation
This option is for pure Linux systems without Docker.
Extract Package: Upload and extract the offline package:
tar xzf GMSSH_package.tar.gz -C .
cd GMSSH_install_dir
Initialize & Start:
- First run: Execute the init script:
bash ./deploy.sh init - Start service: Execute
bash ./deploy.sh start
- First run: Execute the init script:
Port Configuration (Optional): The service uses TCP 80 by default. To change the port (the system will auto-restart):
bash ./deploy.sh setport <your-new-port>Verify Status:
- Run
bash ./deploy.sh statusto check service status. - Once running, visit:
http://<Server-IP>:<port>.
- Run
Important Notes
- Permission Required: All commands above require root privileges or sudo.
- Security Group: Make sure to allow the corresponding TCP port in your server firewall or cloud platform security group, otherwise the Web UI will be inaccessible.
Desktop Client (Recommended)
If you need to manage massive server fleets or want the ultimate local experience, the GMSSH Desktop Client is your best choice. Visit the GMSSH Client Download Page and select the version for your OS:
- 🪟 Windows: Supports Windows 10/11.
- 🍎 macOS: Fully compatible with Intel and Apple M1/M2/M3 chips.
- 🐧 Linux: Coming soon.
Client Advantages
Compared to the Web edition, the Desktop Client provides more powerful productivity:
- Ultimate Performance: Built with Electron, deeply optimized for concurrent management of thousands of servers.
- Local Privacy: Data stored locally, combined with local network access for enhanced security and responsiveness.
- Enhanced Batch Jobs: Supports large-scale concurrent script dispatch with real-time result aggregation.
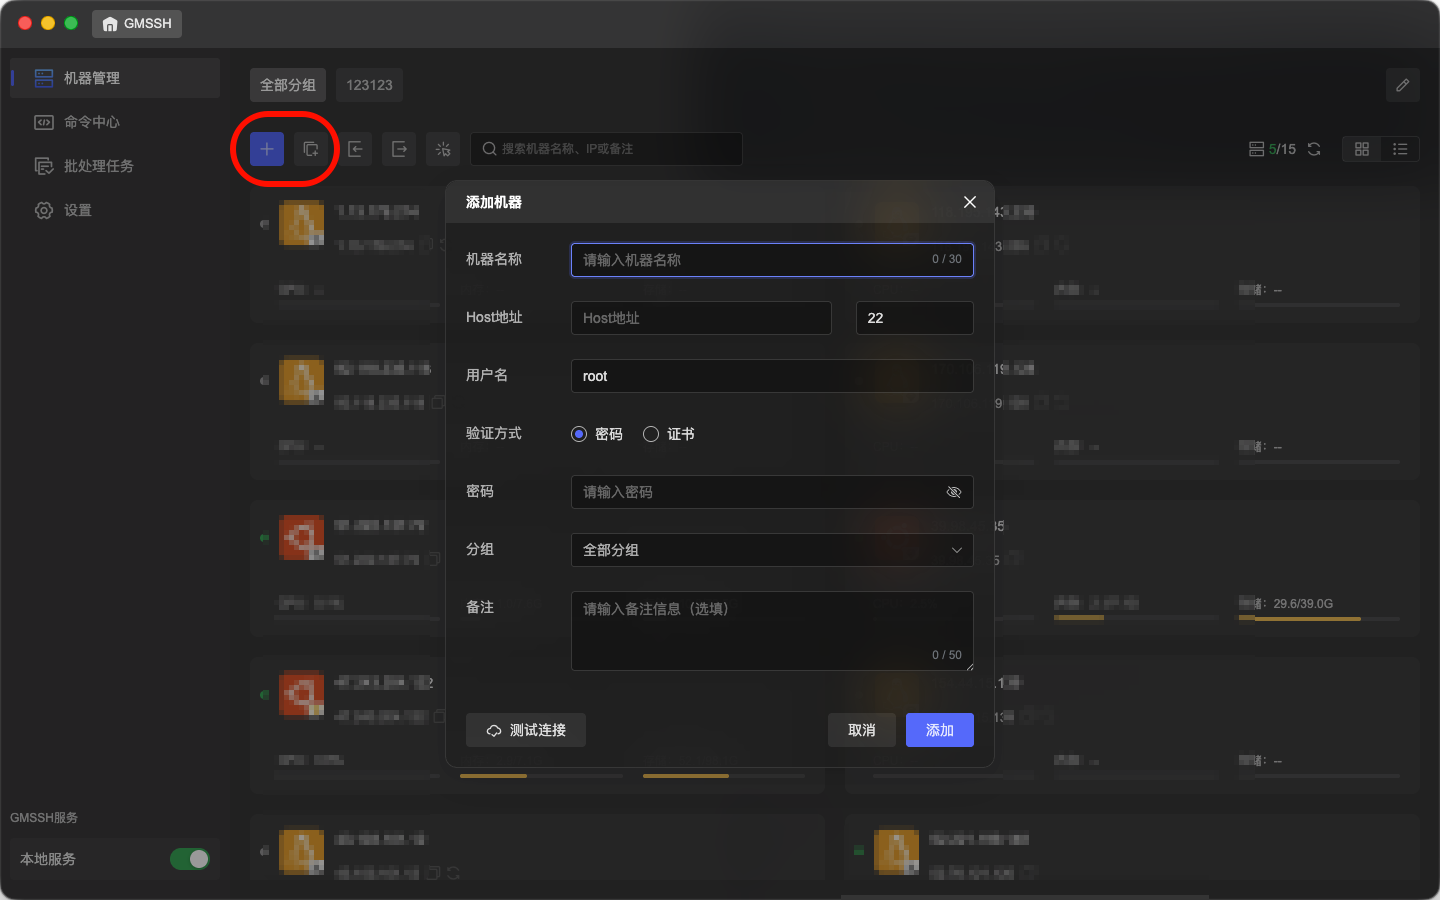
Getting Started
- Launch: Open the GMSSH client after installation.
- Create/Import Connections: You can manually add individual servers, or use the batch scan feature to quickly import server clusters from your LAN or public network.
FAQ
For connection issues and other common problems, see the FAQ.